
When my grandmother first showed me her way of cleaning a clogged dryer vent, I’ll admit — I was doubtful. No fancy gadgets, no pricey maintenance visits. Just a vacuum, a vent brush, and her old leaf blower from the garage. She gave me that calm, knowing smile and said, “This keeps your dryer running right, keeps your house safe, and doesn’t cost a dime more than it should.” And she wasn’t wrong.
Most people don’t realize that a clogged dryer vent is more than just a nuisance — it’s a real fire risk. According to the U.S. Fire Administration, clothes dryers cause nearly 2,900 home fires every year, and failure to clean the vent is the top culprit. On top of that, lint buildup makes your dryer less efficient, drives up energy costs, and shortens the machine’s lifespan.
So when Grandma called this a “must-do,” I paid attention.
Grandma’s Step-by-Step Dryer Vent Cleaning Method
Simple. Safe. Incredibly effective.
✅ Step 1: Safety First
Unplug the dryer. If it’s gas-powered, turn off the gas valve too. Pull the machine slightly away from the wall — just enough to reach the vent connection.
✅ Step 2: Vacuum the Vent Opening
Using a vacuum with a hose attachment, clear out all visible lint and dust from the back of the dryer and the floor around it. You’d be amazed how much collects there, even with regular lint-trap cleaning.
✅ Step 3: Brush Out the Duct
Insert a long, flexible dryer vent brush (they cost under $20 at most hardware stores) into the duct. Twist and push gently to loosen lint and debris clinging to the inside walls.
✅ Step 4: Vacuum Again
Once you’ve loosened the buildup, go back in with the vacuum to remove all the loosened lint.
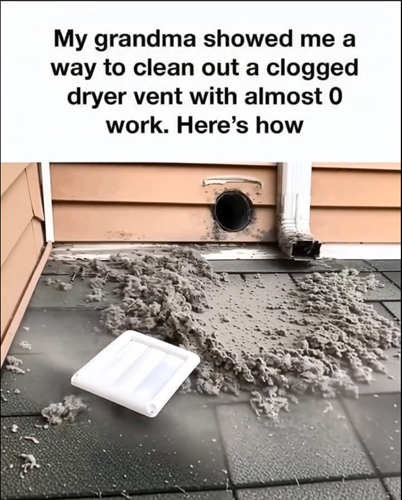
✅ Step 5: Grandma’s Leaf Blower Trick
Here’s the genius part. Head outside to where your dryer vent exhaust exits the house. Remove the cover (usually held on by a few screws), insert the leaf blower nozzle into the vent, and give it several strong bursts. Watch as clouds of lint and dust shoot out — it’s oddly satisfying!
✅ Step 6: Reassemble and Test
Replace the vent cover, reconnect the dryer, and slide it back into place. Run a quick cycle with a small load. You’ll notice it right away — quieter operation, faster drying times, and a cooler-running machine.
Why I Still Do It Her Way
The first time I helped Grandma with this, I was stunned. The dryer worked like new — clothes dried evenly and faster, and that faint burning smell I hadn’t even noticed disappeared completely. More importantly, I knew the fire risk was greatly reduced.
Grandma always did this twice a year — once in spring and again before winter. And now, it’s a tradition I’ve proudly kept going.